
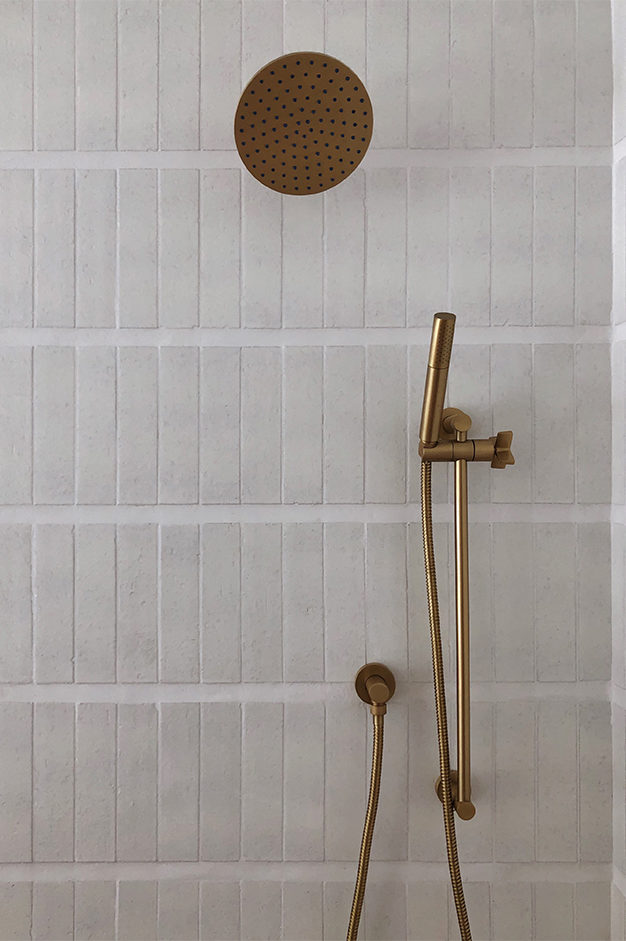
I posted this photo on instagram right when the shower trim was installed last year. We were still in the middle of renovating so this was the closest to a finished photo I had to share and I had no idea the response it would get. The tile layout was an experiment, it is something I had never seen done before… an idea I had that I would only dare try out on my own house, so if it was a failure it would only be my own mess to clean up. However, as soon as I posted the photo the questions flooded in, within a month I already saw three other bathroom renovations mimicking the layout on instagram and those are just the people that tagged me. I caught some flack for not explaining how I did it, but the truth is… for the same reason I didn’t feel comfortable trying this out in a clients bathroom for the first time, I didn’t want to share how I did it and be responsible for a slew of bathroom renovations that could go wrong. After a year of living with it and the shower getting daily use, I can now speak to how it has hold up and feel more comfortable sharing the process. I am sure this has been done before, we all know there is pretty much nothing new under the sun, but for me this was new. An original idea that I had to figure out how to execute myself (while leaning heavily on the tile experts I worked with, although this was also a new process to them as well). So here it is…
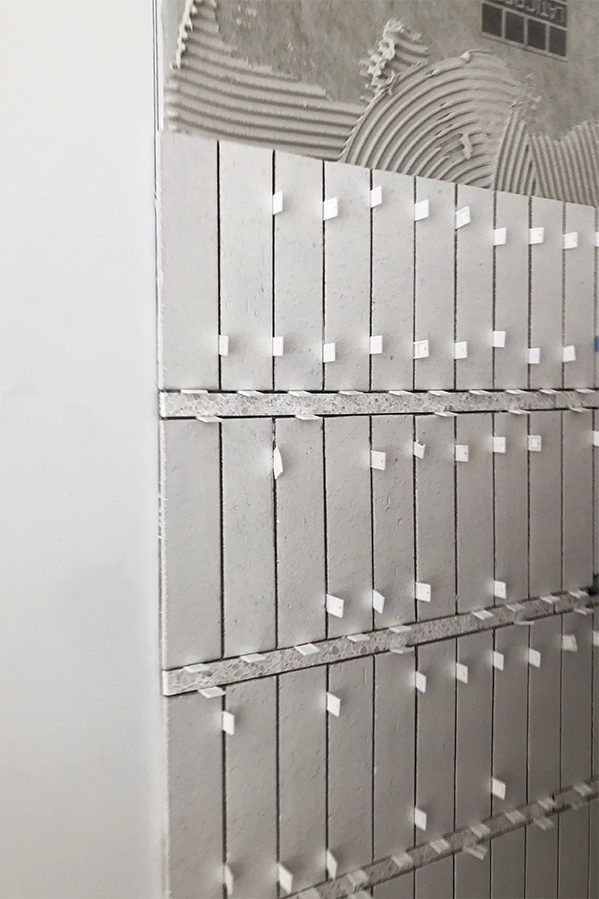
The best part about this treatment is its’ simplicity. The idea couldn’t be more simple. I used an extra large 1″ grout line going horizontally and skinny 1/8″ grout line going vertically. Another thing I love about this simple idea is that it could be applied in a million different ways to get drastically different results. It can be applied to different colored tiles, different shapes, different grout ratios, different colored grout…(you get the picture) to create entirely new layouts. There are a few things to consider on installation, you can’t just use any type of grout for this and it might not be applicable in every space or with every tile either ( please follow manufacturers guidelines and listen to your tile installer) but so far it has held up well in ours.
Here is what we did.
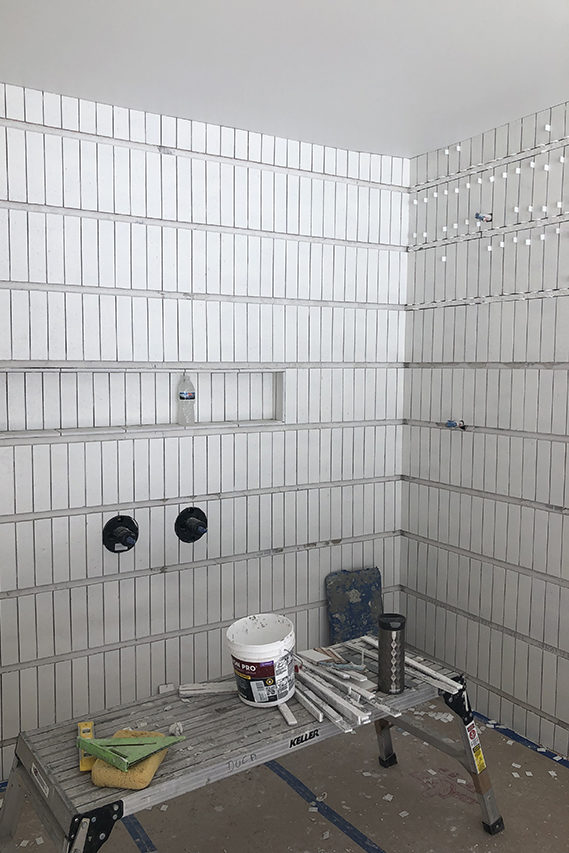
We started with Clé Tile’s modern farmhouse brick in matte white. I love the handmade quality and the color variation. No brick is exactly the same and thats what makes this install extra special. Next, we used TEC Power Grout. This grout is much more stain resistant and holds form better during the application process. We used it in “bright white”.
Next, to get the spacing, our tile guys cut leftover pieces of the terrazzo we used in other parts of the house in 1″ stripes. This can easily be done with wood strips but we used what we had on hand. These strips were then removed as the thinset cured.
That is it! I don’t think I would use this treatment on a steam shower or a bathroom with poor ventilation. Our shower doesn’t have a door so it gets plenty of airflow which may also be why the grout has not discolored at all for us. We also have noticed a few hairline cracks in the grout as the house has settled, but overall I am extremely happy with how it turned out and has held up. I hope this helps to inspire new ways of using traditional tile shapes and here’s hoping it continues to last! proceed at your own risk. ha x
Sources: Tile is Clé Tiles Modern Farmhouse Brick in Matte White // Grout is TEC Power Grout in “bright White” // Shower faucet from Rejuvenation


Branding and Initial Web Design
Nature
Web Design Production
Jane Reaction
Site Development
Alchemy + Aim
Never will there be a fancier temporary spacer than terrazzo- ha! It looks absolutely stunning.
haha right?!
I had been wondering how that thick grout line would hold up as most sanded grouts say max 1/2”! Thank you for sharing! It’s beautiful!!
Love it. I want to see your vanity! Also, are your terrazzo floors matte or glossy finish? X
I second this!! I actually came on here hoping we’d get a little morsel on the custom concrete vanity/sink. But perhaps she’s been giving it time just like this tile install before sharing.
Thank you for sharing! It turned out fabulous and I appreciate you wanting to make sure it held up well.
Hi sarah,
That tile is so beautiful! I want to do something similar in my shower but worried the thick grout will start to show cracks after awhile. Did you seal the grout in yours?
What mirror is that? I have been looking for a similar mirror? Is the mirror backlit?
Did you have to fill in the 1″ area of grout enough to cover the top and bottom of the tiles?
[…] matte white on the walls and the Natural Zellige on the floor. Read all about how we executed the wall tile treatment here. I designed the custom concrete vanity with an integrated sink and had it fabricated […]
I am curious if you could give any insight into how the application of the grout was done. How did you keep the one inch grout line looking smooth while also making sure to remove any grit haze from the tile? I would be afraid that as I wipe the grout off the tile face that I would mess up the finish of the thick grout line. I really want to try this but it makes me nervous!
Did you use a schluter tile edge strip where the tile transi to REGULAR wall?
Hi Gina!
No, Cle offered glazed trim tile so it looks like an edge so no need for a schluter.