
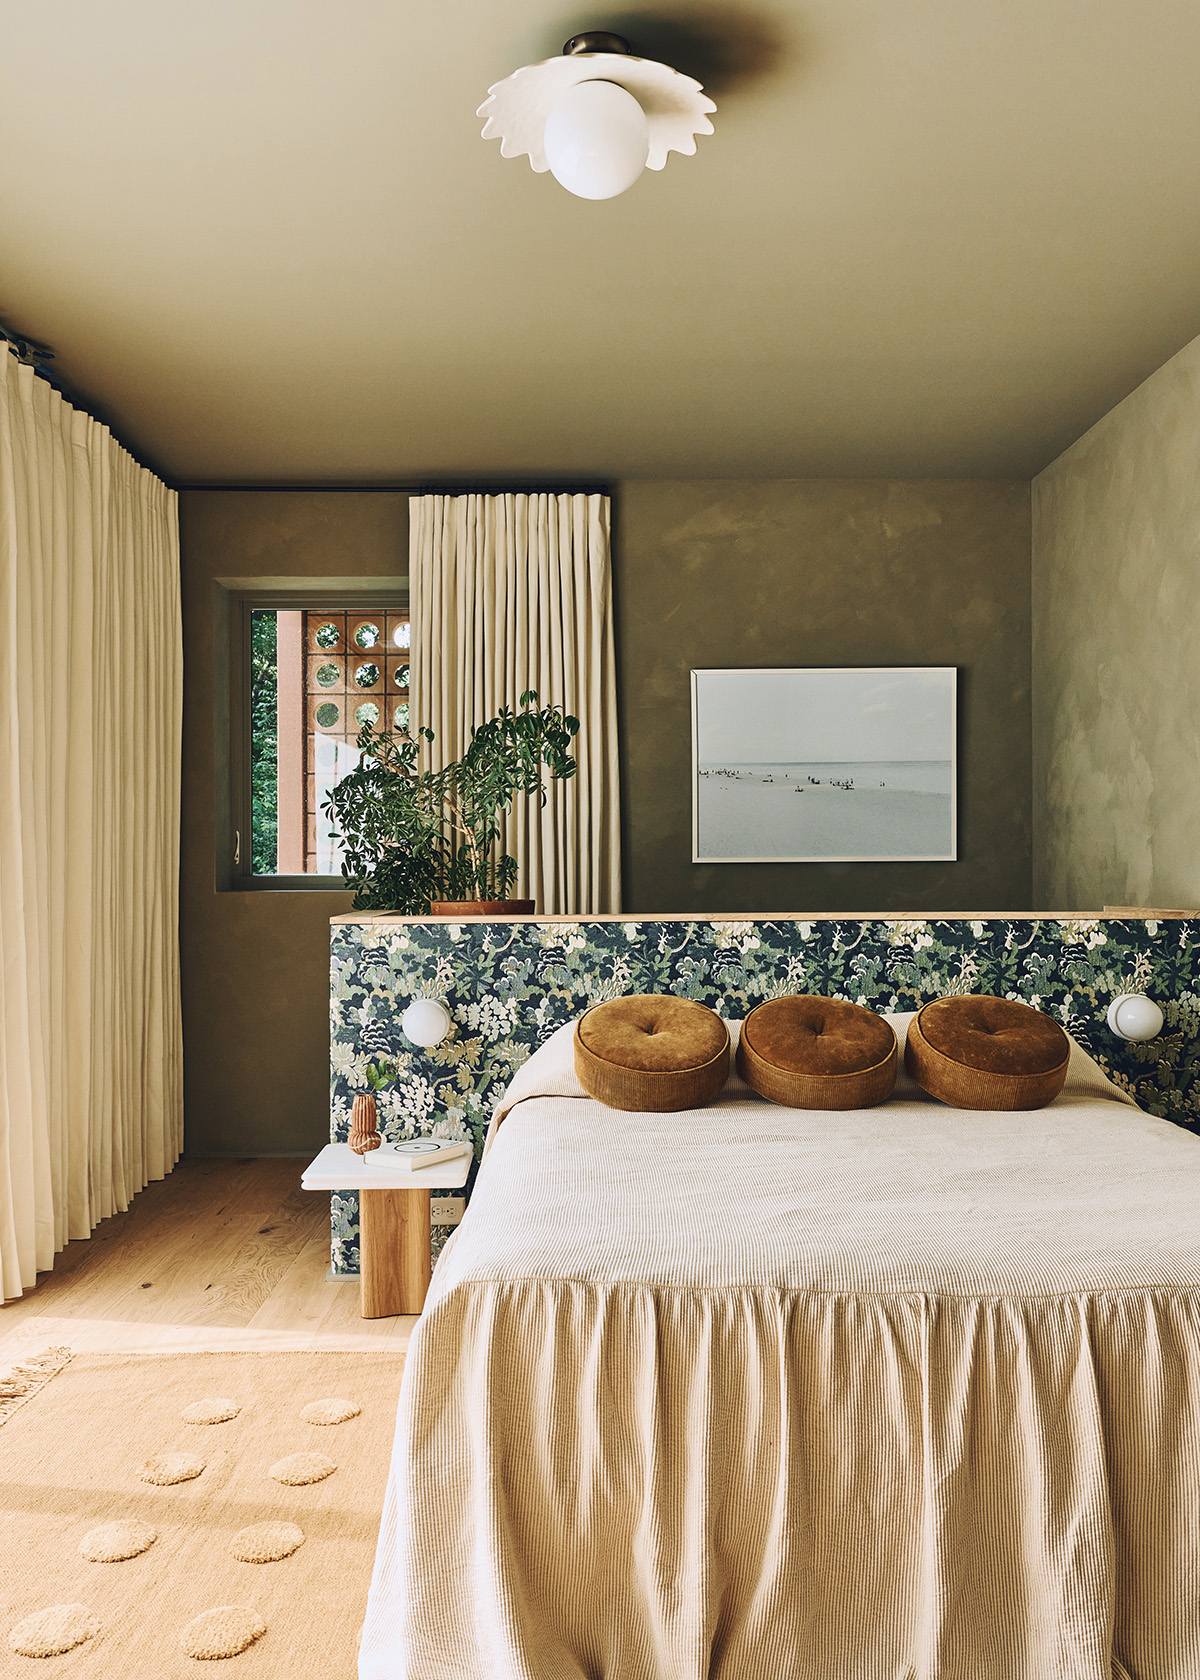
 I’ve got a double whammy post today with the reveal of our A-frame cabin finished guest bedroom (with before and afters) as well as the DIY info for the headboard which you got a peek of a couple weeks ago when I posted on the DIY wood paneling. I love how this simple small space turned out!


 This corner of the cabin was SO dark before with gold grasscloth walls, carpeted floor, and painted red/brown wood (you’ll see in the before’s at the bottom of the post), and the first thing we did was brighten it up on the cheap with paint and this tile flooring.
It still needed further refinement so we tackled the DIY wood paneling (also quite budget friendly) which you can read all about in my last post. I wanted to keep this small space really clean and minimal but still feel relaxed so we brought in a vintage rug, this platform bed, and kept the bedding and bench white to match the walls. The small wood side tables add warmth and the sculptural lamps (from Target) bring just enough geometric visual impact to double as functional art.
When it came time for me to come up with a headboard idea, I saw these floor cushions and thought hanging them on the wall would be a perfect relaxed but modern take on a headboard.
HEADBOARD DIY
Supplies needed:
2 Floor Cushions
3/4″ Copper Pipe
Leather (or Faux Leather, I found mine at Walmart!)
Needle & Thread
Exacto Knife
Hammer & Nails
Tape Measure
 Step 1: Once you have everything ready, use the exacto knife to cut 4 strips of leather that measure 3.25″ x 7″ (you don’t really need 7″ in length but I made it longer than necessary so it was easier to handle while sewing and then trimmed the excess after).
 Step 2: Fold the piece of leather in half and starting 4″ from one edge of the cushion use a simple up and under hand stitch to sew the strap onto the cushion.
 Step 3: Repeat step 2 for the other side of the cushion and then again on the second cushion.
 Step 4: You can pick up the copper pipe at a local hardware store and have them cut it down to size for you or use a sawzall to cut it. This will vary depending on the size of bed you have (I had the pipe hang past the edge of the bedframe about 5 inches on each side).
Step 5: Loop the copper pole through the leather straps and secure to the wall. I used 8 small finish nails, driving the nail into the wall at an upwards angle so that the copper pipe sits securely in the V shape created by the nail and the wall. I placed the nails on either side of each leather strap so they are hidden but the actual strap. An alternative option would be to use matching copper brackets to attach it to the wall but I used what I had on hand at the time.
 And you’re finished! So now, as promised, onto the before and afters of the room…
BEFORE AND AFTER
 And now for a view once we got it all cleaned out…

Shop the Post: Platform Bed Frame // Bench // Vintage Rug // Lamps from Target // Bedside Table from High Fashion Home // Cushions (for DIY headboard) // Paint color is Polar Bear by Behr

Branding and Initial Web Design
Nature
Web Design Production
Jane Reaction
Site Development
Alchemy + Aim
wow. impressive. as always.
Hi there! Love this idea. Do you have any more photos of how you secured it into the wall? (Trying to visualize your description, but having a hard time). Also, how long is the copper pipe/what size bed is that? Would love to do this with my queen sized bed! Currently without a headboard and very into this!
Hi Molly I forgot to take photos of that part unfortunately, maybe I can try and explain better. Instead of driving the mail in perpendicular to the wall I drove it in at a 45° angle creating a V-shaped between the wall in the mail that the pipe rests in. Does that help?
That makes sense, Thank you! (Sorry, I’m a visual learner, but this helped!). Do you happen to know what length the pipe was/what size bed you have there? Going to try this project myself! 🙂
Easiest way is to measure your bed and add 10″ for the length of the pole.
Love. And I really like that bench, wanting it for my entryway. The link brings me to Urban Outfitters but I can’t find that actual bench on their site. Did you purchase it a while back?Any help would be appreciated, thank you!
You did an amazing job! What size rug is that? Love everything about this!
It’s a vintage rug so it’s a really odd size and I don’t have it on me unfortunately. I’d say it’s about 3 1/2 x 7′.
This is really, really cool. Bookmarking for our guest bedroom !
What a transformation! Looks great. I can’t help but wonder though, how secure the pipe will be when people are leaning on the cushions…? I’d worry they’d tear it off the wall.
Thanks! We tried and tested it right away and 8 nails drivin in at a 45 degree angle hold it tight. We’ve used it for a few months now and have had guests day and so far no problems at all but like I said in the post I probably recommend brackets for the optimum support.
Hey Sarah, that bedding looks comfy! Where is it from?
It’s from target!
Sarah, this is stunning! I’m wondering what the bedside lamps and tables are? Thank you!
The links to the lamps and side tables are at the very bottom of the post. X
Hello,
Great post. I love those lamps and have been trying to source them for my own home. Unfortunately, the link only take you to a search of sorta similar Target lamps, not this specific product. I’ve search all of Target’s lamp and can’t find this one. I noticed the same thing on the living room post that also featured this lamp. Please, would you be so kind as to share the link where this particular lamp can be bought? Thanks!
Hi, they are from target but no longer available which is why I linked to similar.
Lovely idea, the headboard looks comfortable and I love the colours. The before and after pictures are amazing. Can you tell me where did you find the lamps beside the bed
They are form target but no longer available.
Stunning and genius
Hi Sarah,
I’d love to replicate this for my master bedroom. What size is the bed that’s shown? We have a king, so I’m wondering if i need to buy 3 cushions instead of 2. Thanks!
[…] off the living room is a den which we (and the previous owners) used as a second bedroom. We put up the wood paneling and created a diy headboard for a cozy sleeping […]
[…] Source […]
[…] Harris’s baby #2 gender reveal is such a sweet moment (Jillian Harris) 7. A very clever DIY Headboard made with pillows (Sarah Sherman Samuel) 8. I’m still not over the royal wedding. If you’re not either, […]
[…] bedroom and ultra-clever DIY all in one. Could we ask for anything more? See how interior designer Sarah Sherman Samuel crafted a seriously chic headboard to elevate the whitewashed simplicity of this A-frame cabin. […]
Elegant and casual. I really like it.
[…] Tutorial via Sarah Sherman Samuel […]
[…] new owners! This room is the little den bedroom just off of the living room. You might remember the DIY headboard I had in there previously and how we added the vertical paneling to cover some horrendous walls. We […]
[…] so what could be better than a headboard made of cushions? That’s right, this tutorial from sarahshermansamuel shows you how to make a headboard using two floor cushions, a copper pipe, leather strips and some […]
[…] so what could be better than a headboard made of cushions? That’s right, this tutorial from sarahshermansamuel shows you how to make a headboard using two floor cushions, a copper pipe, leather strips and some […]
[…] so what could be better than a headboard made of cushions? That’s right, this tutorial from sarahshermansamuel shows you how to make a headboard using two floor cushions, a copper pipe, leather strips and some […]
[…] so what could be better than a headboard made of cushions? That’s right, this tutorial from sarahshermansamuel shows you how to make a headboard using two floor cushions, a copper pipe, leather strips and some […]
[…] Proyecto Sarah Sherman Samuel […]
[…] is a new-to-me idea for a DIY headboard by Sarah Sherman Samuel and I love that it made me stop, look and think about my own bedroom […]
[…] Sarah Sherman Samuel […]
[…] Tutorial: sarahshermansamuel.com […]
[…] cozy headboard idea comes from Sarah Sherman Samuel and was designed for a small space in her cottage. The step-by-step picture guide includes detailed […]
[…] Tutorial: sarahshermansamuel.com […]
[…] DIY Cushion Headboard […]
[…] This DIY cushion headboard is an easy win-win project for you to work on! By just simply adding a few floor cushions as your headboard, your room will certainly get the cozy vibe that will attract you, even more, to lay down on your bed. Also, it will compliment your rooms’ modern decor to the full! sarahsherman […]
[…] and the softness will make it best to add beautification to any home’s decor. This fantastic DIY cushion headboard will provide a stunning modern appearance in your bedroom. Pair it with the white bedsheets and […]
[…] a serious project… more like hanging pillows on a wall behind the bed. But look! From ‘Sarah Sherman Samuel’, this simple idea makes the room look cozy and finished, without having to pull out the power […]
[…] pair of cushions large soil will be pearls for this project. Otherwise, you need a copper tube, some strips of fake leather (or another resistant fabric that […]
Hi! I love this and im curious how far Up the wall did you place the rod?
[…] via SSS edit […]
[…] you want to enhance your space with a unique touch, this is it DIY wall-hanging pillow headboard is the way to go. It allows you to personalize your headboard and show your […]